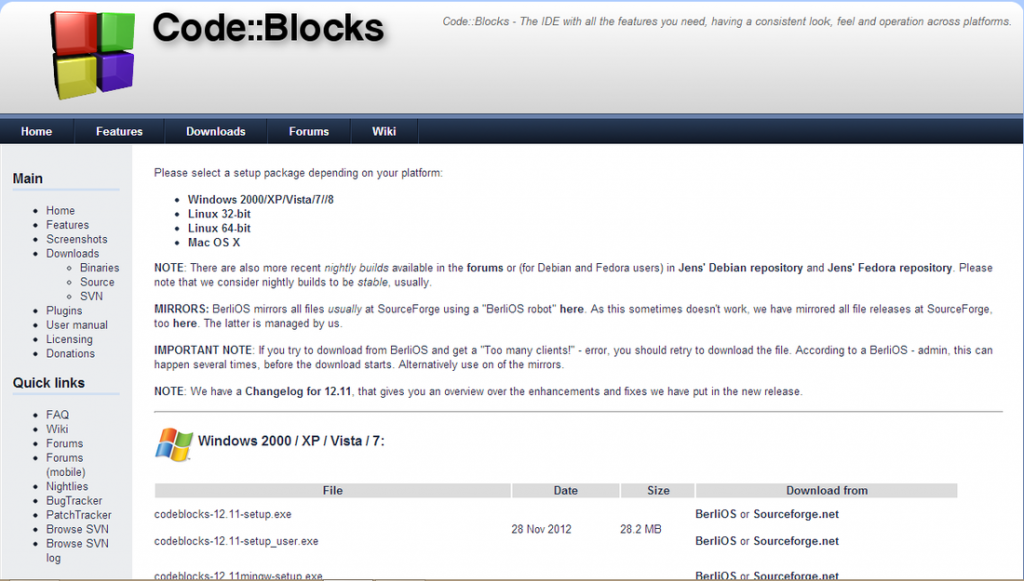
Click here to read about installation in windows
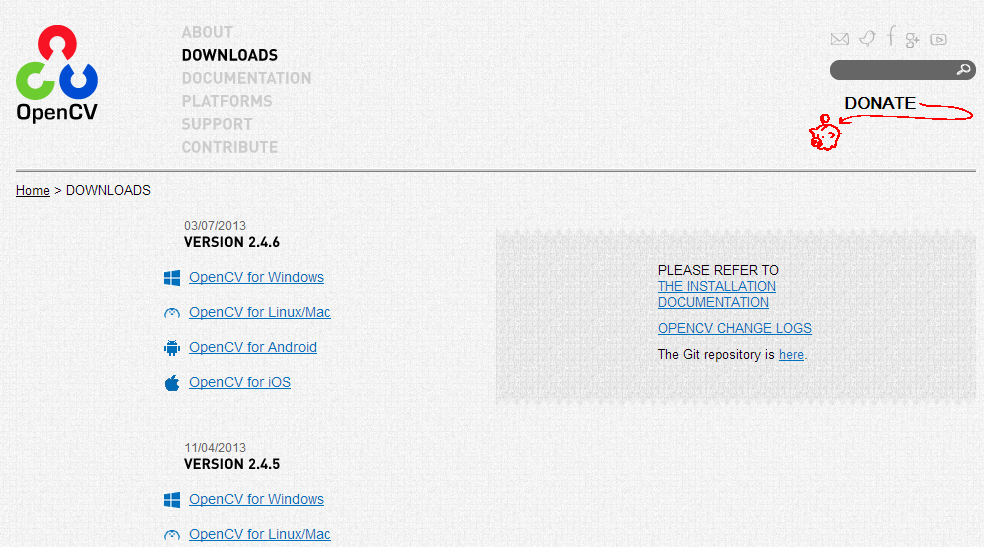
Download OpenCV
Now follow the link given below to download openCV for Windows.Download OpenCV
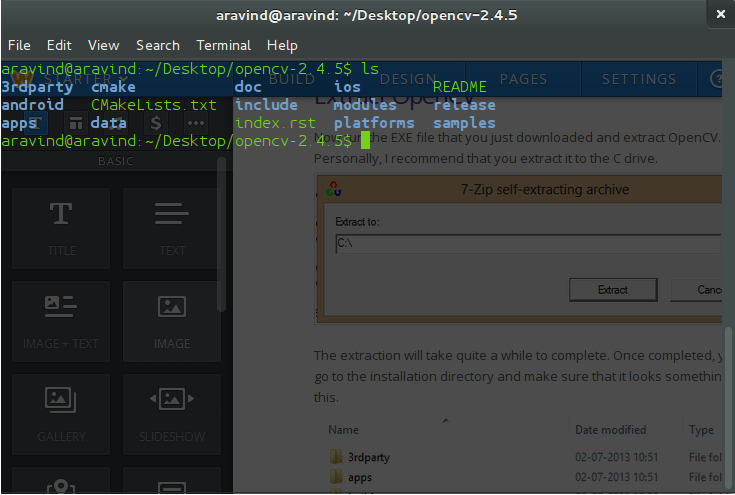
Extract OpenCV
cd ~/Desktop
tar -zxvf opencv-2.4.6.tar.gz
cd Opencv-2.4.6
Before making opencv, we have to ensure that all the necessary libraries and softwares have been installed. For that run the following command in the terminal.
sudo apt-get install build-essential cmake pkg-config libpng12-0 libpng12-dev libpng++-dev libpng3 libpnglite-dev libpngwriter0-dev libpngwriter0c2 zlib1g-dbg zlib1g zlib1g-dev libjasper-dev libjasper-runtime libjasper1 pngtools libtiff4-dev libtiff4 libtiffxx0c2 libtiff-tools libjpeg8 libjpeg8-dev libjpeg8-dbg libjpeg-prog ffmpeg libavcodec-dev libavcodec53 libavformat53 libavformat-dev libgstreamer0.10-0-dbg libgstreamer0.10-0 libgstreamer0.10-dev libxine1-ffmpeg libxine-dev libxine1-bin libunicap2 libunicap2-dev libdc1394-22-dev libdc1394-22 libdc1394-utils swig libv4l-0 libv4l-dev python-numpy
remove any library or software which is creating problem in the above step.Now recheck whether you are in the Opencv-2.4.6 folder.Now we have to create a folder named “release”.
mkdir release
cd release
Now build the OpenCV using the following command.
cmake -D CMAKE_BUILD_ -D CMAKE_INSTALL_PREFIX=/usr/local -D BUILD_PYTHON_SUPPORT=ON ..
Now make and install OpenCV using the following commands.
make
sudo make install
This step will take quite a long time to complete. Its better to ensure that you keep your laptop plugged while making OpenCV.
Now we have to add the library path of OpenCV to linux. Inorder to do that follow these commands:
cd /etc/ld.so.conf.d
touch opencv.conf
sudo gedit opencv.conf
/usr/local/lib
Now run the following command to complete the installation.
sudo ldconfig -v
export LD_LIBRARY_PATH=/usr/local/lib:$LD_LIBRARY_PATH
Inorder to check whether the opencv has been properly installed, you can type in the following in the terminal:
pkg-config opencv --libs
pkg-config opencv --cflags
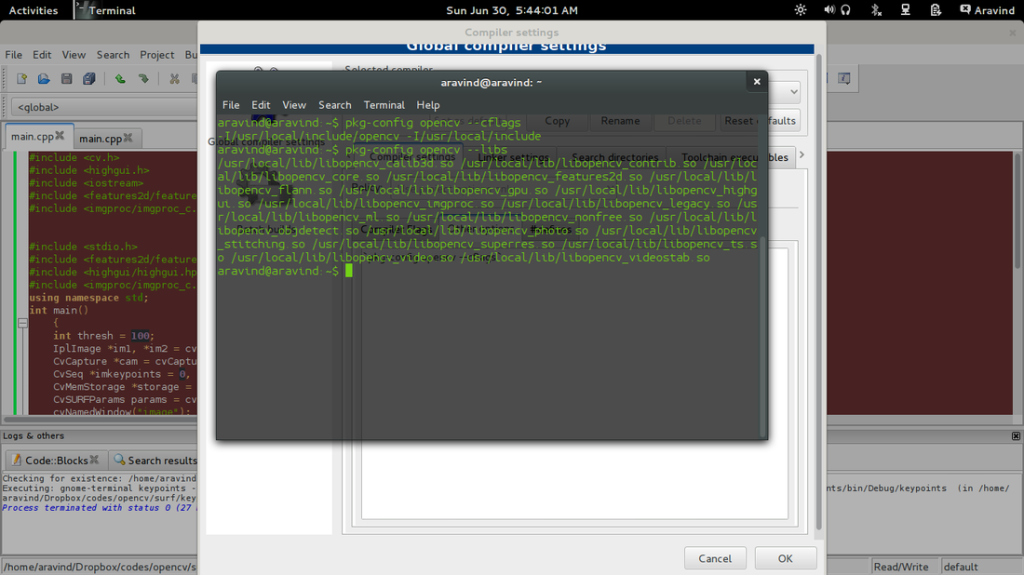
Configure Code Blocks
Now go to settings –>compiler
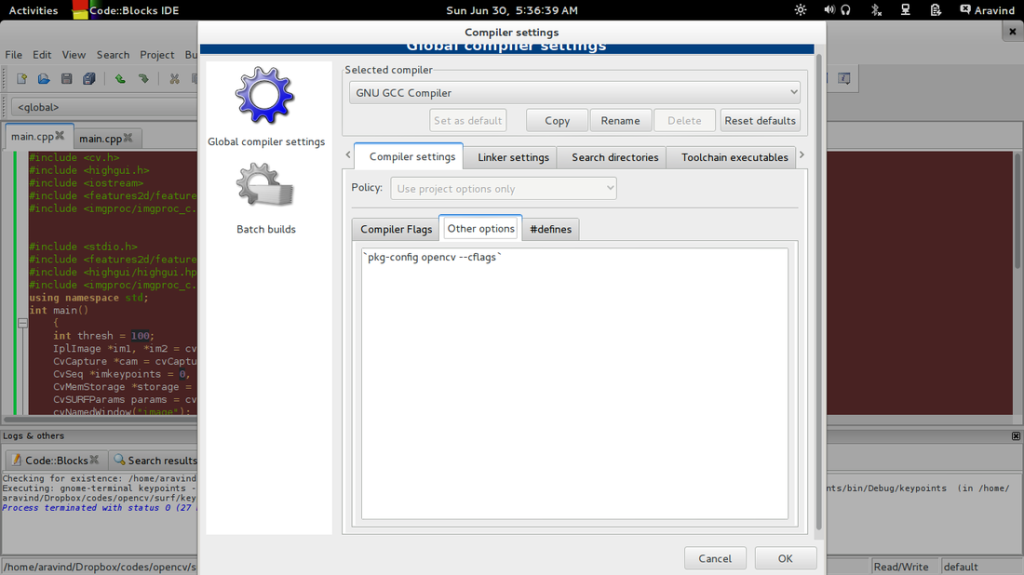
Under the compiler settings tab select the other options tab and copy the following command into the pane.Make sure that you are not using the apostrophe but the symbol just next to the number 1 on your keyboard.
`pkg-config opencv –cflags`
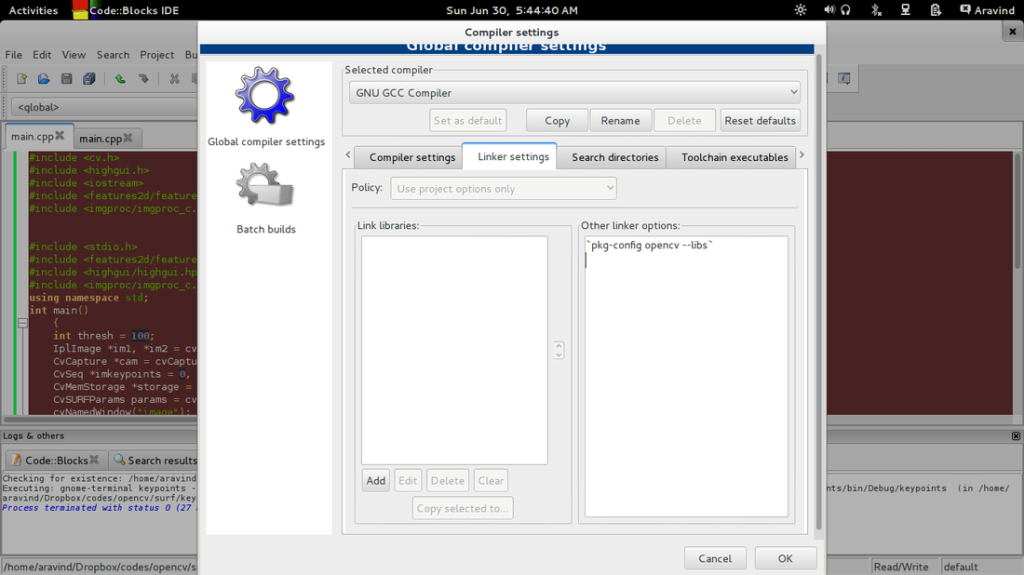
`pkg-config opencv –libs`
/usr/local/include/
/usr/local/include/opencv
/usr/local/include/opencv2
Click OK to save the settings.
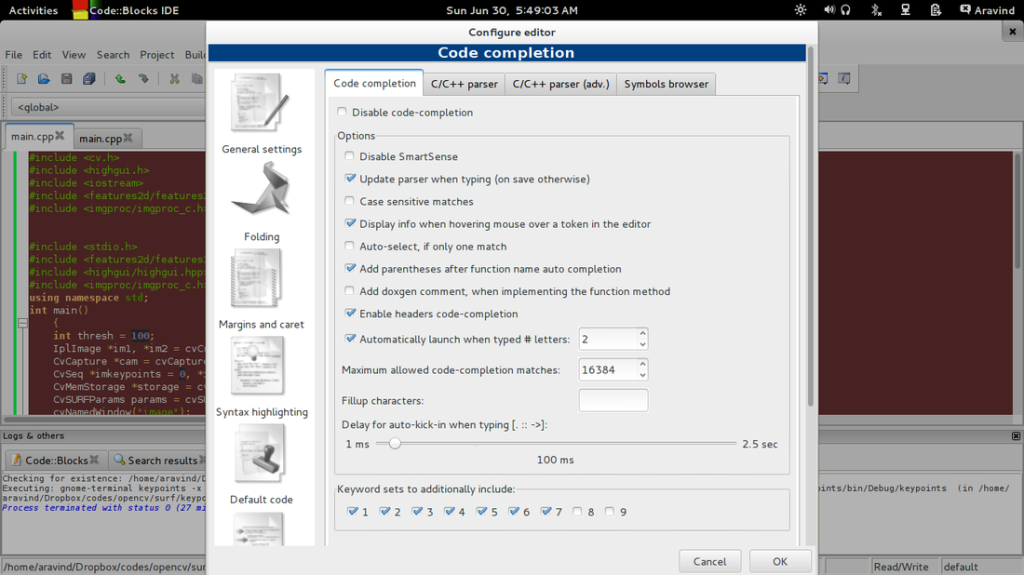
The last step is to enable autocomplete feature of CodeBlocks. Auto complete is a helpful feature of Code Blocks, as we dont have to remember the numerous functions and its parameters when coding in OpenCV.
Now Inorder to enable auto complete open the editor options from the settings menu. and make the selections as shown below:
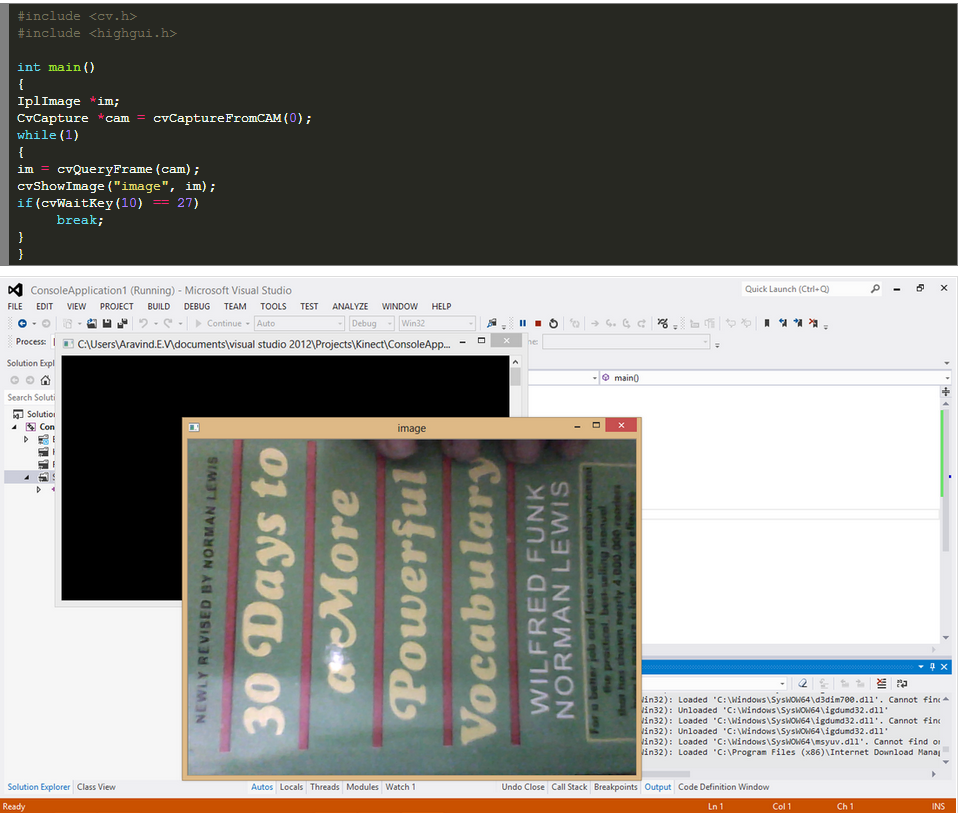
Test your installation
Hey there! Would you mind if I share your
blog with my zynga group? There’s a lot of folks that I think would really appreciate your content.
Please let me know. Cheers